Guidance for designing an objective from scratch
Several people have reached out for guidance on designing and building an objective from scratch, when they have little-to-no background in custom optics. Here are some notes on the topic, in broad strokes, focused on the practicalities.
Avoid it. It’s generally better to work with experts to get what you want built, however, this is easier said than done. Custom optics come in all shapes and sizes, and only a minority of freelancers and firms have experience with microscope objectives. It can take a lot of work to get them up to speed on your project, and they might need to do a lot of research themselves to execute the project. For example, a firm that has primarily made photography or illumination optics may have little experience with calculating pulse front distortion. But if you connect with the right person, and have good communication with them, the process can be relatively painless. Still, expect it to take a year or more.
If you can’t avoid it, and want to do it yourself, you can. This way, you’ll have more control over the process, and you can do more projects in the future.
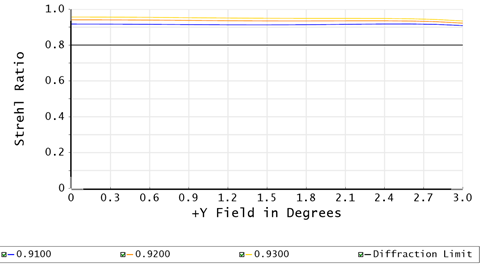
Learning. You’ll need to start with the fundamentals of optics: the wave nature of light, diffraction, the ray abstraction of light, geometric optics, aberrations, and so forth. Maybe you already learned that in your undergraduate classes. You can always get a textbook and brush up. Know about resolution, how to read an MTF plot, Strehl ratio, vignetting, and so forth. If you’re working with ultrafast lasers for multiphoton imaging, make sure you know all about dispersion and pulse front distortion.
Then you need to get a copy of Zemax or Code V. Other optical design software exists, but you can quickly require functions beyond what they offer, so you might as well start with something full featured. There’s a learning curve with any software. Work through the tutorials and watch online videos that seem relevant.
Prior art. Next, you’ll need a starting point. Find an objective that has similar specifications as what you’re shooting for. Start with the same general layout. Patents are a common place to start. Here is another place to find designs.
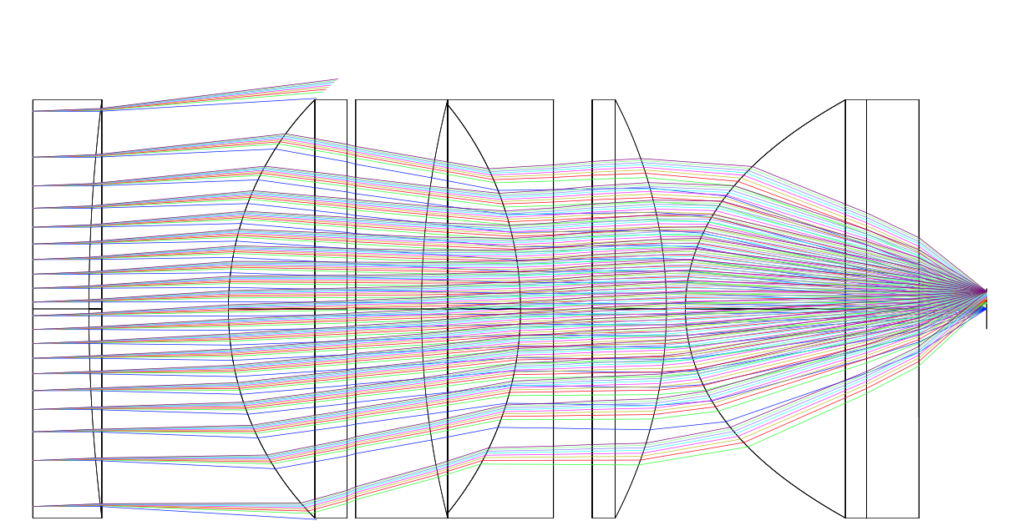
Merit function magic. Now set your merit function to optimize for the specifications you care about. This is where experience matters. Knowing how to program that merit function and how to constrain your design is where a lot of the work comes in. A veteran designer can do this relatively quickly, and a beginner might need a month or more of exploration, trial-and-error, and further learning to hit upon designs that meet their goals.
Tolerance analysis. Okay, the above is all theory and modeling. Next we need to actually build it. Find out what tolerances you’re going to be working with and perform your tolerance analysis. If you know what optics house will build it, ask what their tolerances are. Usually, there are multiple levels. For example, if they’re doing all passive alignment, that can be less expensive but involve somewhat loose tolerances. Active alignment can accommodate tighter tolerances, but comes at a price.
If you find that your design is unbuildable because it would require unrealistically tight tolerances, then modify your design. Again, experience matters here. But one starting point is to find your “worst offender” (the element that is most sensitive to imprecise positioning) in your tolerance analysis and focus there. Can you split that lens into two lower power lenses? Adding lenses can backfire though, as there are now more free parameters. Custom aspheres can sometimes help make a design manufacturable by minimizing lenses in the design.
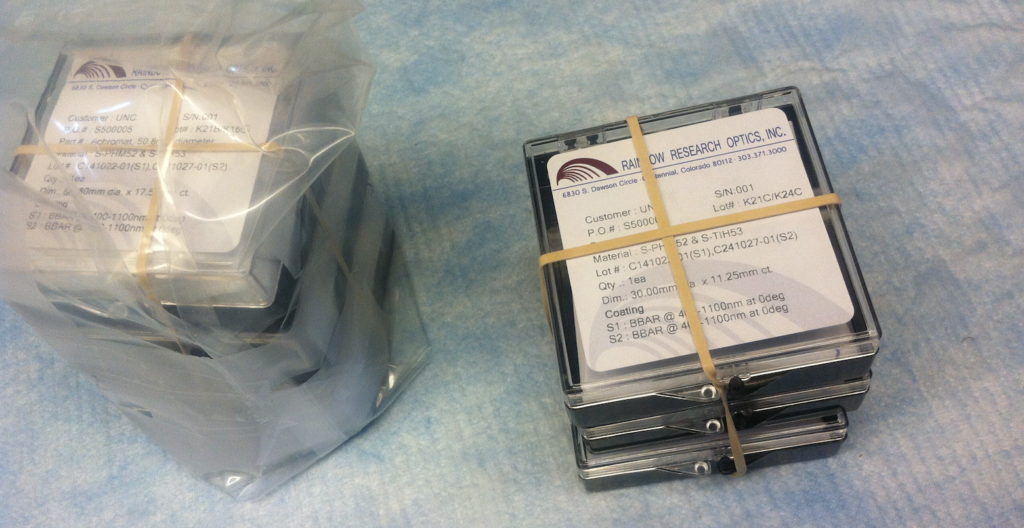
Pick an optics house. You can have the lenses made at one place, have them shipped to a coatings firm, and then have them shipped to you and you put them together. We’ve done that. It works. It’s certainly inexpensive, and can be fast, but you have to do all of the alignment yourself. If you go this route, we can share some tips. What we recommend is going with an optics house. Find a company that can do the job from your design. The optics house will make the lenses and design the optomechanics. They’ll have to build it, align elements, and assemble it. Let the firm handle all of that as an integrated scope-of-work. That way, they have no one to blame except themselves if the end product is misaligned. They can’t blame the optomechanics design, because they made that. They can’t blame the lensmaker, because that’s them. It’s good to have all of that responsibility lie in one place.
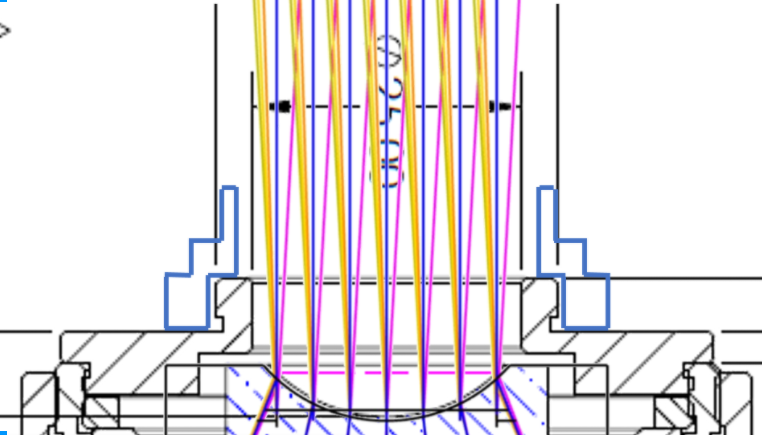
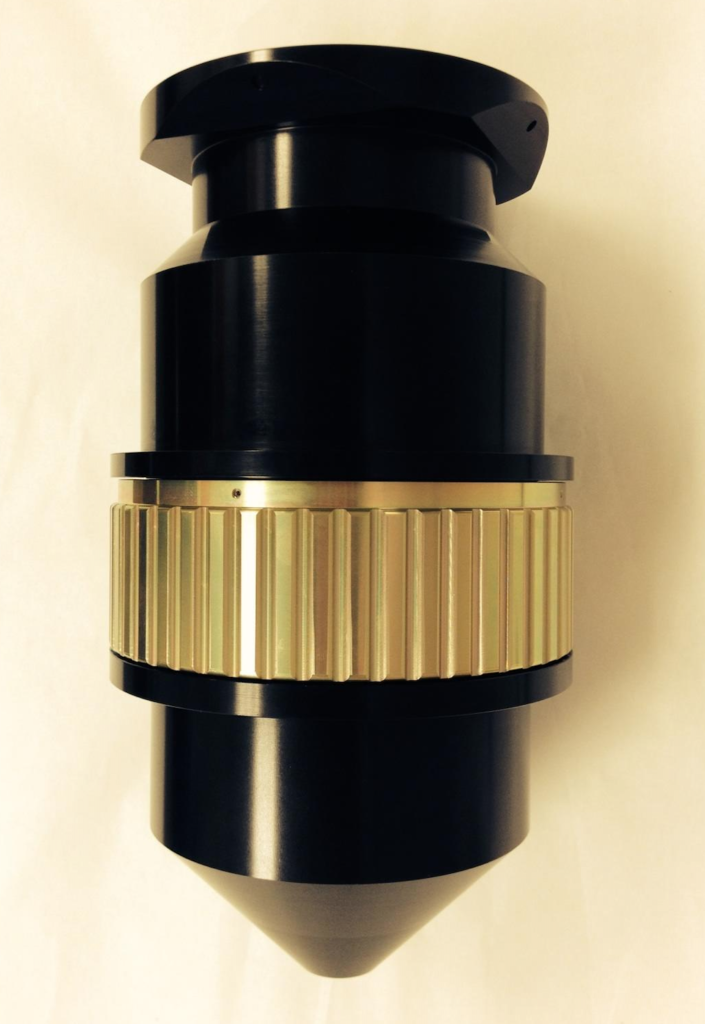
Optomechanics. Once you have a buildable design, you’ll want to think about mounting everything. For microscope objectives, you’ll want to think about how to seal the terminal element if it will be in contact with immersion media like water or oil. You’ll also want to think about the dimensions– can you mount it on the microscope or will it be too large? What threading do you want to use? Is there an adjustable air gap (correction collar), and if so, how do you want it to work? What labeling do you want on it? Degrees of rotation? Or calibrated to coverslip thickness or immersion media refractive index? Work with the optics house to come up with a design. They’ll do the CAD work, and you’ll vet it. The optics house should be able to provide a precise quote for the job at this point. You’ll sort out the anti-reflective coatings at this point as well. They don’t always get incorporated in the model, but you’ll want to ensure your wavelengths make it through the elements.
Fabrication. Once this is all sorted out, you can give the green light to the optics house to start fabrication. But you’re not done. You can’t go on vacation and come back to a finished product. There are problems that get solved along the way.
Sourcing glass is one. If your design uses glass that they can’t get, the optics house may suggest a substitute with similar properties. You can swap that into your model, re-optimize (air gaps only, usually), and see whether there is any impact on performance. If performance is fine, then you can okay the swap and, if needed, update them on what the air gaps should be.
If you have an element that is quite large, it might be difficult for them to find a glass blank that is large enough. If you need to wait for a custom glass pour, you could be waiting a year or more just for that one element, so it’s good to find alternative strategies, if possible. Actually, you’re probably not going to do a custom pour, just have a custom block cut from a pour. If you do that, consider buying some of the material in bulk in case you want to make more than one of that element.
Problems with the optomechanics can also pop up. Sometimes an initial design will need to be modified due to unforeseen challenges in machining or assembly. In exceptional cases, the optics house may request additional NRE (non-recurring engineering) charges. It’s not a nice surprise, but the optics house could be doing everything right and still have things like this pop up. You wouldn’t have given them the job if you didn’t trust them and have good communication, so it’s probably okay to proceed.
Done? Finally you’ll get piece and you can try it out. Hopefully it will work right out of the box, and that has been our experience for the most part. But if there are problems, you can discuss with the optics house and maybe send it back for modification.
What do you think? Any thoughts to add?